Hey there! I'm a supplier of SS Braided Hoses, and I've seen my fair share of damaged hoses over the years. Today, I'm gonna walk you through how to repair a damaged SS Braided Hose. Whether it's a small leak or a more serious tear, I'll share some tips and tricks that can save you time and money.
Understanding SS Braided Hoses
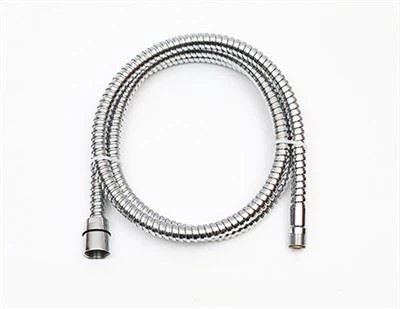
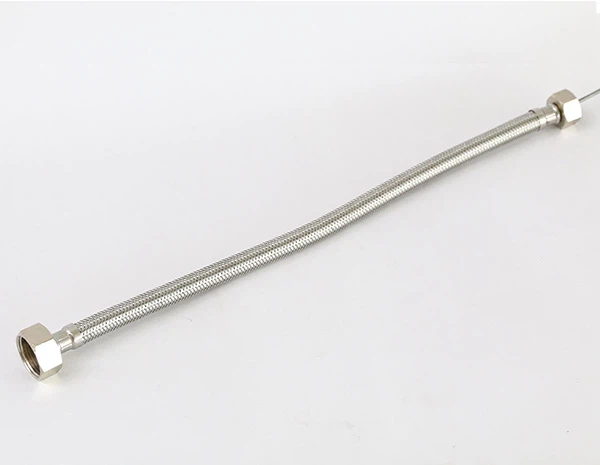
First off, let's talk a bit about what SS Braided Hoses are. These hoses are made of a stainless - steel braid that surrounds an inner tube. The stainless - steel braid provides strength and durability, while the inner tube is usually made of materials like PVC or other polymers. They're commonly used in various applications, from plumbing to industrial settings. You can check out more about Stainless Steel Braided Hose on our website.
Identifying the Damage
The first step in repairing a damaged SS Braided Hose is to figure out what's wrong with it. There are a few common types of damage you might encounter:
Leaks
Leaks are probably the most common issue. You might notice water dripping or spraying from a particular spot on the hose. Sometimes, it could be a small pinhole leak in the inner tube, or it could be a problem with the connection at the ends of the hose.
Tears in the Braid
If you see a tear in the stainless - steel braid, it's important to address it quickly. A torn braid can compromise the strength of the hose and lead to further damage, like the inner tube bulging out.
Damaged Ends
The ends of the hose, where it connects to other components, can also get damaged. This could be due to improper installation, wear and tear, or corrosion.
Tools and Materials You'll Need
Before you start the repair process, gather the following tools and materials:
- Adjustable wrenches
- Pipe cutter (if you need to cut the hose)
- Replacement fittings (such as couplings or connectors)
- Sealant tape (like Teflon tape)
- Hose clamps
- A new inner tube (if the inner tube is severely damaged)
Repairing a Leak
If you've identified a leak in the hose, here's how you can fix it:
Step 1: Turn Off the Water
This is a no - brainer. Before you start working on the hose, turn off the water supply to prevent any further mess.
Step 2: Locate the Leak
Inspect the hose carefully to find the exact location of the leak. Sometimes, the leak might be hidden under the braid, so you might need to gently move the braid aside to get a better look.
Step 3: Patch the Leak
For small pinhole leaks in the inner tube, you can use a hose repair patch. First, clean the area around the leak with a cloth to remove any dirt or debris. Then, apply the patch according to the manufacturer's instructions. Make sure it covers the leak completely.
If the leak is at a connection point, you might need to tighten the fittings. Use an adjustable wrench to gently tighten the nuts or bolts. Be careful not to over - tighten, as this can damage the fittings. You can also wrap some sealant tape around the threads of the fitting before reconnecting it to create a better seal.
Fixing a Torn Braid
If you've found a tear in the stainless - steel braid, here's what you can do:
Step 1: Assess the Damage
Determine how severe the tear is. If it's a small tear, you might be able to repair it. But if the braid is severely damaged, you might need to replace the entire hose.

Step 2: Secure the Braid
For a small tear, you can use hose clamps to hold the braid together. Place the clamps on either side of the tear and tighten them. This will prevent the tear from getting bigger and keep the braid in place.
Step 3: Reinforce the Area (Optional)
If you want to add some extra strength to the repaired area, you can wrap a small piece of stainless - steel wire around the braid near the tear. This will provide additional support.
Replacing Damaged Ends
When the ends of the hose are damaged, you'll need to replace them. Here's how:
Step 1: Cut the Damaged End
Use a pipe cutter to cut off the damaged end of the hose. Make sure you cut it straight and clean.
Step 2: Choose the Right Fitting
Select a replacement fitting that matches the size and type of your hose. You can find a variety of fittings for PVC Connection Hose and other types on our website.
Step 3: Install the Fitting
Apply some sealant tape to the threads of the fitting. Then, insert the end of the hose into the fitting and tighten it using an adjustable wrench. Make sure it's secure and there are no leaks.
When to Replace the Entire Hose
Sometimes, the damage to the hose is too severe to repair. Here are some signs that you should consider replacing the entire hose:
- The inner tube is severely damaged or has multiple leaks.
- The braid is extensively torn or corroded.
- The hose is old and has been through a lot of wear and tear.
If you need a new hose, we offer a wide range of Rec Braided Shower Hose and other types of SS Braided Hoses on our website.
Maintenance Tips to Prevent Future Damage
To keep your SS Braided Hoses in good condition, here are some maintenance tips:
- Avoid bending the hose at sharp angles. This can cause stress on the braid and the inner tube.
- Regularly inspect the hoses for any signs of damage, such as leaks, tears, or corrosion.
- When installing the hoses, make sure the connections are tight but not over - tightened.
- If the hoses are exposed to harsh chemicals or extreme temperatures, consider using hoses that are specifically designed for those conditions.
Conclusion
Repairing a damaged SS Braided Hose isn't as difficult as it might seem. With the right tools, materials, and a little know - how, you can fix most common issues. Whether it's a small leak or a damaged end, following the steps outlined above can save you from having to replace the entire hose.
If you're in the market for new SS Braided Hoses or replacement parts, we're here to help. We've got a great selection of high - quality hoses and fittings to meet your needs. Feel free to reach out to us for more information or to start a procurement discussion. We're always happy to assist you in finding the right products for your projects.
References
- Plumbing Handbook by John Smith
- Industrial Hose Guide by ABC Publishing