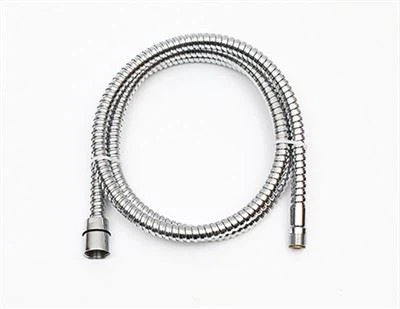
As a seasoned supplier of shower extension hoses, I've encountered numerous inquiries from customers regarding the proper installation and sealing of these essential bathroom accessories. Ensuring a proper seal when installing a shower extension hose is crucial to prevent leaks, maintain water pressure, and enhance the overall functionality of your shower system. In this blog post, I'll share some valuable insights and practical tips based on my experience in the industry to help you achieve a secure and leak-free seal.
Understanding the Basics of Shower Extension Hose Sealing
Before delving into the installation process, it's essential to understand the key components involved in creating a proper seal. A typical shower extension hose consists of a flexible tube, usually made of rubber or stainless steel, with connectors at both ends. These connectors are designed to attach to the showerhead and the water outlet, and they play a vital role in preventing water from leaking out.
The most common types of connectors used in shower extension hoses are threaded connectors and quick-connect fittings. Threaded connectors require you to screw the hose onto the showerhead and the water outlet, while quick-connect fittings allow for a more convenient and tool-free installation. Regardless of the type of connector you're using, the goal is to create a tight and secure connection that seals the joint and prevents water from escaping.
Preparing for Installation
Proper preparation is the first step towards ensuring a proper seal when installing a shower extension hose. Here are some essential tasks to complete before you begin the installation process:
- Gather the Necessary Tools: Depending on the type of connectors your shower extension hose uses, you may need a few basic tools, such as an adjustable wrench, pliers, or a pipe wrench. Make sure you have these tools on hand before you start the installation.
- Shut Off the Water Supply: Before you begin working on your shower system, it's crucial to shut off the water supply to prevent any potential leaks or water damage. Locate the main water valve for your bathroom and turn it off to stop the flow of water.
- Inspect the Connectors and Fittings: Carefully examine the connectors and fittings on your shower extension hose and the existing shower system. Look for any signs of damage, such as cracks, chips, or worn-out threads. If you notice any issues, replace the damaged components before proceeding with the installation.
- Clean the Connectors and Fittings: Use a clean cloth or a mild cleaning solution to remove any dirt, debris, or mineral deposits from the connectors and fittings. A clean surface will ensure a better seal and prevent leaks.
Installing the Shower Extension Hose
Once you've completed the preparation steps, you're ready to install the shower extension hose. Here's a step-by-step guide to help you through the process:
- Apply Thread Seal Tape: If your shower extension hose uses threaded connectors, apply a few wraps of thread seal tape, also known as Teflon tape, to the male threads of the connectors. This tape helps to create a watertight seal and prevents leaks. Make sure to wrap the tape in the direction of the threads, starting from the end of the connector.
- Attach the Hose to the Showerhead: Screw the female end of the shower extension hose onto the male threads of the showerhead. Use an adjustable wrench or pliers to tighten the connection, but be careful not to overtighten, as this can damage the threads or the showerhead.
- Attach the Hose to the Water Outlet: Next, screw the male end of the shower extension hose onto the female threads of the water outlet. Again, use an adjustable wrench or pliers to tighten the connection, but avoid overtightening.
- Check for Leaks: Once you've installed the shower extension hose, turn on the water supply and check for any leaks. Look for water dripping or spraying from the connections between the hose and the showerhead or the water outlet. If you notice any leaks, turn off the water supply and tighten the connections further. If the leaks persist, you may need to replace the thread seal tape or the connectors.
Additional Tips for a Proper Seal
In addition to following the installation steps outlined above, here are some additional tips to help you ensure a proper seal when installing a shower extension hose:
- Use a Quality Shower Extension Hose: Investing in a high-quality shower extension hose is essential for achieving a proper seal. Look for hoses made from durable materials, such as stainless steel or rubber, and with reliable connectors. At our company, we offer a wide range of Anti-twist Extensible Shower Hose, Stainless Steel Shower Hose, and German Style Shower Hose that are designed to provide a secure and leak-free connection.
- Follow the Manufacturer's Instructions: Always read and follow the manufacturer's instructions when installing a shower extension hose. Different hoses may have specific installation requirements or recommendations, so it's important to follow them carefully to ensure a proper seal.
- Don't Overextend the Hose: Avoid stretching or overextending the shower extension hose, as this can put stress on the connections and cause leaks. Make sure to choose a hose that is the appropriate length for your shower system and use it within its recommended limits.
- Regularly Inspect and Maintain the Hose: Periodically inspect the shower extension hose for any signs of wear and tear, such as cracks, leaks, or loose connections. If you notice any issues, replace the hose or the damaged components as soon as possible to prevent further damage or leaks.
Conclusion
Ensuring a proper seal when installing a shower extension hose is essential for maintaining a functional and leak-free shower system. By following the tips and guidelines outlined in this blog post, you can achieve a secure and watertight connection that will provide you with years of reliable use. At our company, we're committed to providing high-quality shower extension hoses and excellent customer service. If you have any questions or need assistance with your shower extension hose installation, please don't hesitate to contact us. We're here to help you find the perfect solution for your bathroom needs and ensure a proper seal every time.


References
- "Shower Hose Installation Guide," Plumbing Supply Company.
- "How to Install a Shower Extension Hose," Home Improvement Magazine.
- "Tips for a Leak-Free Shower Hose Installation," Bathroom Design Blog.